Tuesday, May 4, 2010

Blog Hiatus

It seems I have taken a bit of a blog hiatus lately, but there is a good reason, really there is!
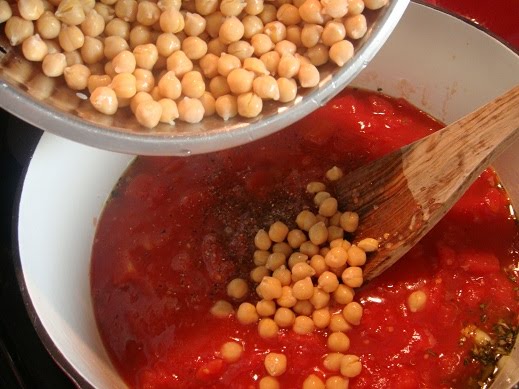
We have always strived to eat well in our house, but eating well, and eating healthy are not always the same thing. Over the past few months, I have been slowly but surely shifting the way I cook. With my work days being few and far between as of late, I have been spending a lot of time on the internet, reading, learning, and absorbing some thoroughly amazing information. A lot of it has been quite eye opening. So much, in fact, that I think my cooking methods, and the way we look at food itself, may now be forever changed. My husband, who is always searching, researching and learning about ways to keep us healthy, has opened my eyes to a whole new way of looking at the ways in which we nourish our bodies, and the differences it can make on our health and well being.


The three main influences, which have segued off into all kinds of different directions, have been these:

1: Nourishing Traditions, a book by Sally Fallon. As my husband and I read more on eating nourishing, traditional foods, and the benefits to your body and your health, this book was referenced time and time again. So much so, that we finally purchased the book ourselves. It is definitely worth a read.

2: The website for the Weston A. Price Foundation. http://www.westonaprice.org/ This site abounds with information on educating people about healthy traditional diets and the dangers of modern devitalized foods.

3: This website, http://www.180degreehealth.com/home.html which was referenced a few times in my online readings. If you are at all curious, read through the health problems link. I had a huge “AH HA” moment here. The information presented can simply not be ignored.

Because of all the reading I have been doing, and the changes I have been making, I feel it necessary to put this blog on the back burner for now, as I am very much wanting to focus my time and energy on this new journey into nourishing cooking. , I know, a lot of people will (and do!) think we are weird, but, I am okay with weird, normal never really worked for me anyway.....
I fully intend to start a new blog, documenting my adventures and education in the ways of preparing nourishing nutritional foods for my family (ones that they will actually eat!!). As soon as I have the new blog up and running, I will post the new address to it here, so any that want to follow this process can. I am very excited to share this information with you, but it is a lot to digest(literally!). It has taken me three months to fully embrace these new methods. These ideas challenge (and disprove) alot of the dietary truths that we have been taught for so long, this has been a bit of an eye opener for me on a lot of levels. Now I need to document as I go, so I can pass this information along.

I appreciate the support and feedback I have received from this blog, it has been a fun journey, and one that I believe has helped lead me to the path we are undertaking now. The recipes and content of this blog will stay, as is for future reference! Thanks to all my readers and followers, I hope to see you at the new blog!

PS: Until I can get my new blog up and running, I will give you a few more links, that have become favourites, so you don’t get bored!

http://www.thenourishinggourmet.com/

http://thenourishingcook.com/

http://www.livingthenourishedlife.com/

http://kellythekitchenkop.com/

Monday, April 12, 2010

Lemon Yoghurt Cake

If you have been reading my blog for any length of time, you probably already know one of my favourite blogs is Orangette. Molly has never steered me wrong with a recipe, and her site is one of the first places I go when looking for inspiration, dinner, or just to pass some time. (now, if I could only get her to come and cook with me.....!!) She published a book last year, entitled A Homemade Life, and I was fortunate enough to find it under my tree this past Christmas. This is a book to be savoured, her stories and recipes are poignant, funny and deliciously romantic all at once. She writes and cooks from the heart, which is the beginning and ending of all great food. I love the fact that she encourages you to do as she does and play with the recipes, and, the eternal words of wisdom, read the entire recipe first! (this part, I need to work on!!) I have been reading it slowly, a recipe or two before I go to bed at night, which, I must now admit, has its problems! Almost every recipe leaves me wanting to make it, right then and there. 11pm at night is not the time to be starting to cook, for me anyway! I guess that is what bookmarks are for....


When I read the recipe for the French style Yoghurt Cake with lemon glaze, I knew it would be an awesome cake. After all, it was the cake that led Molly to meet the man who would become her husband. (See, food is love!) When our wonderful neighbours came for dinner Saturday night, it was the perfect excuse to try the cake. All I can say is Wow. It was an awesome cake, just like I knew it would be. Light, lemony ,and moist, everything it promised to be and more. Even today, 2 days later, the last small piece that I shared with Jim after lunch today, still delicious.

I made the recipe pretty much as is, my only real substitute was using my 9”springform pan instead of a 9” cake pan, which I do not have. I was almost tempted to substitute an 8” cake pan, but after seeing how much it rose, I am glad I did not. I did substitute the canola oil for a nice fruity olive oil that I have right now, which was a suggestion on the blog version of this recipe. I have been buying organic lemons whenever I can find them lately, I find a big difference in the taste, and this cake highlights the flavour perfectly.


Lemon Yoghurt Cake, taken from A Homemade Life, by Molly Wizenberg

Cake:

1 ½ cups unbleached all purpose flour

2 tsp baking powder

Pinch of salt

2 tsp lemon zest (I used the zest from one whole organic lemon, it was very close to 2 tsp)

½ cup well stirred plain yoghurt, NOT low or non-fat

1 cup sugar

3 large eggs

½ cup olive oil

Syrup:

1/4 cup icing sugar, sifted

¼ cup lemon juice (I used fresh squeezed organic, I find the taste difference well worth the extra price)

Icing:

1 1/2 cups icing sugar, sifted

3 tbsp lemon juice


For the Cake:

Preheat the oven to 350 Degrees F. Grease a 9” cake pan or spring form pan. Line the bottom with parchment paper (important step!) and grease this too.

In a medium bowl, mix together the flour, baking powder and salt.
Mix in the lemon zest and whisk to thoroughly combine.


In another bowl, whisk together the yoghurt, sugar, eggs and olive oil (the original recipe has you add the olive oil separately, I did it all together with no problem. I said I needed to work on reading the whole recipe, didn't I!!)
Combine the wet ingredients with the dry, and mix just to combine. Do not over mix!


Pour into prepared pan

Bake for 25-35 minutes (mine took closer to 40) or until a toothpick inserted in the center comes out clean.

For the Glaze and Icing:

While the cake is cooking, Make your glaze and icing.  I juiced 3 organic lemons, that were kind of smallish in size, and it was the perfect amount of juice for both the glaze and the icing.

 I strained the juiced lemons before mixing with the icing sugar.
Mix the glaze ingredients in one bowl, and the icing ingredients in another.  Set aside.


Cool the cake, right in the pan, on a wire rack for about 15 minutes.

Run a knife around the edge to loosen if necessary, and invert the cake onto a large plate. Remove the parchment paper, and flip back over on a wire rack—it should now be right side up. Set the rack over a pan with an edge. Spoon the glaze over the warm cake slowly, letting it absorb as you spoon.
Let cake cool completely.

Spoon the icing mixture over the cooled cake

Let the icing firm up for at least an hour. ( original recipe says you can eat it right away as well, feel free!)

I slid my cake off the wire rack and onto my serving plate before I finished spooning on the icing, so it pooled around the outside edges. Divine!

Saturday, March 27, 2010

Chickpea, Tomato and Rosemary Soup

Fresh herbs rule. When the cold weather rolls in and puts my garden to bed for the winter, my herbs are what I miss the most. Grocery store herbs are alright, but my favourite place to buy fresh herbs in the winter is a little grocery/specialty shop in Dundas, Ontario, called Picone’s. Along with the beautiful display of aromatic fresh herbs, they also carry local and organic produce, artisan breads, specialty oils and vinegars, a beautiful pastry table, and, as we discovered on Friday, they make a mean Cafe Latte. I could extol the virtues of this little food market for this entire post. Really, I could ramble for on for days, it is such a cool little store. But this post, it is all about the rosemary, and what it does for this simple and unassuming soup. A handful of ingredients, just over half an hour of your time, and you will have a big pot of delicious, fragrant, mouth watering soup. And, if you are lucky, your rosemary will come from Picone’s, like mine did!

I have made this soup several times, but always with fresh rosemary. The flavour is divine, and I have my doubts that dried rosemary would measure up. I first found this recipe on the Orangette blog, and have since discovered it is also in my Once Upon A Tart cookbook, in the “Once Upon A Soup” section. I have really not altered it much at all, it is terrific as it stands. I made this batch when Jims Aunt came for lunch this weekend, served with a loaf of homemade bread and fresh butter. Simple, delicious, and satisfying. Well worth the drive to Picone’s to get your rosemary!!

Chickpea Tomato Rosemary Soup , Adapted from Once Upon a Tart

3 Tbsp olive oil

2-3 cloves garlic

1 – 6” sprig of rosemary

2 – 28oz cans of diced tomatoes with their juices

2 – 19 oz cans of chickpeas

1 900ml box of chicken or vegetable stock (or the equivalent amount of homemade)

Pinch of sugar

Salt and fresh ground pepper to taste


Peel and chop the garlic,


Remove the rosemary needles from the stem, and chop finely


Drain and rinse the chickpeas, set aside.


Warm the olive oil in a large Dutch oven or stock pot over medium heat. Add the garlic and rosemary, and let it cook for a minute or so, you don’t want to brown the garlic, you just want the flavours to infuse the oil. Add the tomatoes, ½ of the chickpeas, the stock, sugar, salt and pepper to the pot.

 Bring to a boil, reduce heat, and simmer, covered for 20 minutes.

Remove from heat and puree with an immersion blender. (if you don’t have an immersion blender, you can puree it in batches in your blender or food processor)

It should look a bit like this:


Return to the stove, stir in the rest of the chickpeas,

Heat til the chickpeas are warm.
Enjoy!

Thursday, March 25, 2010

Yoghurt Parfait


Every once in a while I come across an idea and say to myself, now, why didn’t I think of that before?? This little epiphany hit me shortly after reading this post on this blog, the one that inspired my yummy quinoa pudding post. In her pictures, she took her pudding to the beach in a mason jar. It didn’t hit me immediately...my epiphanies are sometimes like that; they need a nudge to come to light. This nudge came from the little containers that I take my daily yoghurt snack to work in. If I have any type of juicy fruit mixture in them, they tend to leak in my lunch bag, which is not pretty. Enter said Mason jar. I can layer my fruit and yoghurt, screw on the lid, and it never leaks, not even a little bit. Epiphany moment, complete with bells and whistles.

So this post is not a recipe per-say, but an idea you can take and adapt as you see fit. My favourite size jar holds about 3/4 of a cup, which is perfect for a mid morning snack.  We can control the amount of sugar, as well as the kind of yoghurt we eat, and it is cheaper than purchasing one of those little parfaits from the local donut store. Easy, cheap, and portable!

We like our yoghurt and berries layered, this is how our parfaits go together.
Gently macerate (lightly mashed with the potato masher)  some berries, and add sweetener of choice if desired.
Spoon into the bottom of the mason jar.
Spoon yoghurt of choice in the middle,
and more berries on the top.

Add the lid, and Ta Da, No leaks!

We use plain yoghurt, but you can use your favourite flavour, and mix up the fruit as you see fit. We have used raspberries, strawberries, blueberries, as well as mixtures of all three. Chunky applesauce also goes very nicely with the tart yoghurt flavour. Sometimes we drizzle some honey or maple syrup over the fruit, and top with a sprinkle of Lindy's granola.

Whatever you choose, it is a perfect mid morning snack in
a cute container that will not leak in your lunch bag.
I like to make up a few at a time to save time in the morning.
Enjoy!

Saturday, March 20, 2010

Isaac's Buttermilk Toaster Waffles


My boys have always loved breakfast food. Eggs, French toast, pancakes, waffles, they could eat these kind of foods till the cows come home. Then they would probably ask for seconds. So, when I was lucky enough to have a day off during march break, and I asked Isaac what he would like for breakfast, it was no big surprise that waffles were on the top of the list. This is the point when I should probably mention that he is hopelessly addicted to, ugh, frozen toaster waffles, from the grocery store. I know, it is sad. But, in my quest to convert him from a processed junk food loving kid to one who appreciates home cooked healthy food, I have stopped buying them. So, his help was recruited, and healthier waffles we would make.


I dug out my trusty waffle iron (and dusted it off...I haven’t made waffles in a while apparently!) and we proceeded to look for a recipe. I remembered this one from Orangette, but the shortbread part kind of threw him off (I will make these one day, but maybe for dessert, with some ice cream, and strawberries...swoon!!) Smitten kitchen was our next stop, and he was sold as soon as he read “ buttermilk”. (that word appears on his grocery store box too...) He mixed together the buttermilk, separated the eggs, and whipped the egg whites. I think I have a new kitchen apprentice in the making!

I doubled the recipe(the recipe below is not doubled) and froze the extras once they cooled, with wax paper between them in the freezer for easy removal, and....TA DA!! Homemade freezer waffles that I don’t mind him eating. Maybe I should have dusted off the waffle iron long ago!

Isaac’s Buttermilk Toaster Waffles (original recipe here)

1 cup whole wheat flour

1 cup unbleached white flour (original recipe used all white, feel free!)

1/2 tsp salt

2 Tbsp sugar

1 1/2 Tsp baking soda

1 3/4 cups buttermilk(I use buttermilk powder mixed with water)

2 eggs, separated

4 Tbsp butter, melted and cooled slightly

1/2 Tsp vanilla extract

neutral flavoured oil for brushing on waffle pan (I use grapeseed, but canola, or the spray cans work fine too)


Mix the dry ingredients together in a nice big bowl. Set aside.


In a separate bowl, combine the buttermilk and egg yolks. Mix in the butter and vanilla. Set aside.


Lightly grease your waffle iron (I used my silicone basting brush and some grape seed oil, you can use canola
oil, or pam) and plug in to preheat.


Mix the wet ingredients into the dry ingredients.


In a separate bowl, whisk the egg whites with an electric mixer until they will hold soft peaks.

They should look like this:


Fold them gently into the batter.


When waffle iron is preheated, ladle the batter onto the hot surface,


close and cook until the waffle is done, mine is usually about 4 minutes, different waffle irons will vary with their timing.


My first waffles always look a bit wonky til I figure out how much batter to use to fill the iron without overflowing it...

Serve while hot,


or cool to room temperature on cooling racks and store in freezer between sheets of waxed paper for easy toaster waffles.


Oh, so yummy!