Wednesday, January 27, 2010

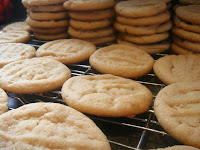
Peanut Butter Cookies


When it comes to cookies, the powers that be in my house seem to be a bit picky.  There are very few recipes that get nominated for repeats.  I can probably count them on one hand.  My mom’s peanut butter cookies are in the top 5  for requests (chocolate chip, shortbread, ginger cookies and my latest macaroons make the short list as well).
These peanut butter ones are perfect-- creamy, tender, just the right crispy on the outside, with a soft middle that melts in your mouth.  In  my early days of baking, I tried a dozen or so recipes, and never came close to  this one that I grew up with.  I finally caved and called my mom, and she very kindly dictated the recipe to me over the phone.  She isn’t quite sure of its original source, she thought maybe from a jar of peanut butter long ago, we may never know. If anyone does recognize this recipe, please do tell, I would love to give credit where credit is due. Until then, my mom gets all the praise!) We do know, however, that it is a recipe not to mess with (kind of like my chocolate chip cookies, that after a memorable blunder, will NEVER mess with again!)   And, it is easy peasy to put together.
As for peanut butter, I always use Kraft Original Smooth Peanut Butter.  I am sure other peanut butters would work just as well, maybe even a crunchy version...(I happen to be married to a peanut butter snob though, Kraft Smooth is my hubbie's favourite, and the word crunchy does not appear on his label!) Anyhoo, use your favourite peanut butter, it just should have a nice creamy consistency. 
This recipe makes a large batch of cookies, which is never a problem here, but I am sure you could freeze either the dough, or the cookies after they have been baked (or send your leftovers here, I am sure I could come up with a couple of kids to polish them off for you.....)

Moms’ Peanut Butter Cookies

½ cup butter softened (2 sticks)
1 ½ cups peanut butter
2 eggs
1 tsp vanilla
1 1/3 cup brown sugar
1 cup white sugar
2 ½ cups all purpose flour
1 tsp baking soda
1 tsp salt (I leave this out if my butter is salted)


In a stand mixer with the paddle attachments, cream together the butter, peanut butter, eggs, vanilla and sugars. 

Let it mix for a few minutes on medium speed to get it nicely combined, and looks like this:


Turn off mixer, and add in the flour, baking soda and salt (if using).  With mixer on low, stir to just incorporate the dry ingredients.


Finish mixing by hand, taking care not to mix too much, over mixing = tough cookies!

Depending on the stickiness, you may need to chill the dough for an hour or so.  I have used the dough right away numerous times, and other times have had to chill it.  If you can roll it into a ball right away, skip the chilling.  I am thinking the difference may be the moisture content of the butter?  If you need to chill it, cover the top of the dough with plastic wrap, and place in the fridge for about an hour.


(or, if it is nice and chilly out, place outside your back door, like this!)


Roll the dough, chilled or not, into 1 inch(ish) balls and place 2 inches apart on your ungreased or parchment lined cookie sheet.  They do spread, so do not crowd your pan!


Dip a fork in sugar,


and slightly flatten balls of dough, leaving the fork impression in the top of each cookie.  Dip the fork in the sugar each time to prevent the fork from sticking.


Bake in 350 degree oven** for 11-13 minutes, or until the cookies are JUST starting to brown on the outer edges. 


Let cookies hang out on pan for about 5 minutes before removing to cool on wire racks.


Makes about 75 cookies.

**I recently invested in an oven thermometer, and when my oven is set to 350 degrees, the thermometer inside reads closer to 375 degrees.  Use your judgement and raise the temp if your first pan of cookies takes longer than 13 minutes to start to brown at the edges.

Yes, that is a rare January sunbeam shining on my cookies!

Tuesday, January 26, 2010

Oven Turkey Stew


What is it about cold blustery days that cause one to crave comfort food?  With the cold rain/snow mixture that we have been experiencing here all day today, turkey stew seemed the perfect remedy to combat the damp chill that overtakes you as soon as you step out the door.  I stumbled across this recipe a few years ago, and have been making my turkey stew this way ever since.  You do need a bit of time, being as it cooks for 2-2 ½ hrs in the oven, and the chopping at the beginning adds a good 10 minutes.  But, if you have a lazy afternoon like I did, this recipe is well worth making. Once it is in the oven, though, you have 2 free hours, to say, watch a movie with a blanket, a cup of tea, a dog curled cozily at your feet, and the fireplace flickering comfortingly in the background. (Ok, in reality, while my stew was in the oven, I was finishing laundry, making beds, unloading and reloading the dishwasher, sweeping the floor, and typing this blog...but the whole movie thing sounds so much better, really!)
I doubled the original recipe, and usually add a bit more veggies than it calls for, as I prefer my stews to be a higher veggie to turkey ratio. The recipe below reflects these changes; adapt the recipe to suit your tastes. I use my large roasting pan, as it makes a substantial amount of stew, and  it makes great leftovers.  Feel free to substitute veggies of your choice as well.  I have, in the past, added mushrooms, chunks of squash, parsnips and sweet potatoes.  I also omit the coriander in the original recipe, and add sage and rosemary, but again, feel free to use your favourites.

Oven Turkey Stew

Preheat oven to 375 degrees.

*If using frozen stock like I did, put it in a pot over medium heat on the stove while you chop the veggies, it will be thawed by the time you need to add it to the stew.

2lbs skinless boneless turkey thighs, cut into bite size cubes ( chicken thighs would do fine as well)
2 medium onions, chopped in chunks
4 large potatoes, washed and cubed
5-6 stalks of celery, chopped
3-4 carrots, sliced
½ of a rutabaga, cut into 1-2 inch cubes
1/3 cup all purpose flour
1 tsp dried thyme
2 tsp dried sage
½ tsp dried crumbled rosemary
1 tsp salt
Fresh ground pepper to taste
3 ½ cups stock (veggie, chicken, whatever you have on hand)
2 bay leaves

Place all chopped veggies into large roasting pan. 
Add the cubes of  turkey. 

Add flour and spices(except bay leaves), and stir all to combine. 

Top with stock.

Put bay leaves into the center of the stew, cover, and cook in preheated oven for 2 -2 1/2 hours  or until turkey is tender and vegetables are cooked through.

Remove bay leaves and stir before serving.


Makes 8 ish servings.


Monday, January 18, 2010

Good Food, Good Friends,

 I had to include some pictures from our recent seafood feast with our good friends Ken and Ally.  They arrived at our house with a plethora of seafood, and the feast was born.  No recipes alas, as the seafood part was a spontaneous cooking experience that I failed to record, (must have been the ceasars and the wine...)but I definitly didn't fail to enjoy! I will try and post a few of the recipes soon, like the new flatbread I made, and the coconut brulee that ended our meal , they are both worth repeating multiple times, and I do have the recipes! So, for now, all you get is pictures, I hope you enjoy!

 This is an Algerian Flatbread called Msemmen, from the new Healthy Bread in Five Minutes a Day book.  It is easy and impressive, and is cooked in a pan on the stove...definitly worth a future blog!

 Red pepper fougasse, recipe link here.

Remnants of some very yummy smoked sheeps milk gouda, even if Ken doesn't really think it was so yummy!!

 Mussels, ready to steam!

Mussels, ready to eat!

Mounds of fresh seafood, shrimp, scallops, monkfish, and squid, from the St. Lawrence Market in Toronto!

Squid Ink Pasta (and my foodie friend Ken in his first ever on-camera blog appearance!)
 
Cooked and ready for the pasta...
 
I expected a strong maybe fishy taste from this, but it really had no taste other than that of fresh pasta, good, but not what I expected. (but makes for good pictures!!)
 
In a word...YUM!I
 
It went very well with the bottle of East Del Black Cabernet.
 
Cheers!

Oh, and we cannot forget the dessert, made lactose free just for Ken, Coconut Brulee.  The recipe for this will hopefully be posted soon. It was, in my opinion, better than the Creme Brulee that I made for new years. The coconut milk made it nice and light, and not nearly as rich as the heavy cream base. (and check out my schmolly little blow torch...my new favourite kitchen tool!)
 

Wednesday, January 13, 2010

Will trade for Duck Eggs....


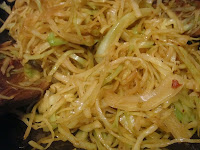
When talking to Ken (my foodie friend) on the phone the other day, the conversation, as it often does, turned to food, and we ended up swapping my leftovers from dinner (Zuni Cafe-ish roasted chicken, roasted red potatoes, and onions, and steamed broccoli) for 6 wonderfully fresh duck eggs that he had procured. Personally, I think I got the best of the deal, although he really enjoyed the leftovers for his lunch that day. But, I am now the proud owner of 6 BEAUTIFUL duck eggs. (notice the bag that he brought them to me in....) When life gives you duck eggs, it calls for a cool recipe, not your ordinary throw-an-egg-in-your-cookie-dough kind of recipe, but something that highlights the richness of these beauties. I browsed and browsed for just the right thing, but the recipe that kept popping up in the back of my mind was the spicy cabbage recipe that I have made quite often from the Orangette blog, but always sans egg. She (Molly) says in her post that it is a perfect meal topped with an egg with a nice saucy yolk...it sounded perfect for lunch on this cold blustery day. And, topped with a duck egg, a match made in heaven. My whole lunch consisted of 5 ingredients, and took 20 minutes from start to finish, which included chopping the cabbage. It really isn’t very pretty, but the flavour more than makes up for the look. The cabbage takes on a whole new flavour, spicy, with a hint of smoky sweetness that is downright addictive. If you have never been a cabbage fan, this may be the recipe to convert you. (My 14 year old, upon tasting it for the first time, said “since when did cabbage taste this good??!!”) The egg on top is perfect. I must say, Molly was right again, (she always is, her recipes have never led me astray...if you haven’t yet checked her blog out, I highly recommend it) We have had the cabbage as a side dish many times, but this was my first try with the recommended egg. It makes a wonderful side dish turn into a perfect, quick meal that satisfies on multiple levels. The duck eggs, with their beautiful orange-doamed yolks were perfectly complimented by the spicy ribbons of cabbage. Sometimes simple just works. I thank you,  Molly for the cabbage recipe, and  Ken for the duck eggs, from the bottom of my stomach!

Spicy Cabbage and Eggs

1-2 tbsp grape seed or other high heat oil
½ head green cabbage
1 tsp Sambal Oelek hot sauce (or to taste)
2 tbsp soya sauce (ish)
2 eggs, regular or duck


Cut your ½ cabbage into two equal pieces, and remove the core.

Slice into nice thin ribbons.


Heat the grape seed oil till it is nice and hot in a wok ( I am sure you could use any other frying pan here, but I like the way the wok lets you toss the cooking cabbage) Toss in the cabbage, taking care with the hot oil, and give it a good mix to coat in the hot oil.


Add the Sambal Oelek, and again mix well (I use 2 wooden spoons) to distribute.


Let it hang out for a bit, so it starts to get some nice colour. Give it a good stir every minute or so until the mixture starts to brown nicely and wilt, about 10 minutes total.


Add the soy sauce, toss well, and turn down the heat.


It can sit and simmer until your eggs are ready.

Heat another pan, add a pat of butter or turn of oil, whichever you prefer to cook an egg ( I use a small pat of butter and maybe 2 tsp of olive oil) Crack your eggs into a bowl, and slide them out into the hot pan.

 I like my yolks runny, so I let them cook for about 2 minutes, and then top with a glass lid to just firm up the whites, but not solidify the yolks, maybe another minute.


When they are cooked to your desired doneness, slide them out of the pan onto a plate of the spicy cabbage, and enjoy. Just look at that beautiful orange yolk....


This made enough for my lunch and lunch for Jim tomorrow. As a side dish the cabbage would serve at least 4.


Thursday, January 7, 2010

If it Ain't Broke....

Sometimes you should just stick with what you know.  Especially if it is your tried and true chocolate chip cookie recipe,

which comes out perfect, every time, pretty much without fail.  It is THE most requested cookie in our house, and for a good reason.  It is one good... no... GREAT... cookie. End of story.  So I have no idea what possessed me to try another chocolate chip cookie recipe.  Maybe it was that the recipe was so similar to my tried and true one or the lure of the fancy cookbook from a trendy New York bakery that swayed me to stray. The boys even tried to talk me out of it. Mac said, and I quote, “if it ain’t broke, Mom, don't fix it!”  But, for some unknown reason, I convinced them that maybe it was time to try something new, the ingredients were close to the ones in my recipe, the technique, though, was a wee bit different, and one I had read about recently.  It has you leaving the mixed dough to sit in the fridge, for at least 6 hours to chill. Apparently this takes chocolate chip cookies to a whole new level.  Whatever it was that possessed me, I should have listened to that little inner voice, telling me not to do it.  (I actually even felt guilty, like I was cheating on Betty Crocker...weird, huh?) But, I forged ahead, and made the dough, refrigerated overnight, and proceeded to make a batch to take into work with me that morning.  So excited I was, as I put the first pan in the oven, turned it halfway thru the baking time, smelling that one of a kind baking chocolate chip cookie smell,  only to be so sadly disappointed by the paper thin greasy cookie like things that came out of the oven.   

Sometimes things just don't work out.  No matter what you do.  I always say that things happen for a reason, and maybe this happened to make me appreciate my Betty Crocker chocolate chip cookie recipe that much more.  If you want a good cookie, stick to this recipe.  It will never steer you wrong!