Saturday, March 27, 2010

Chickpea, Tomato and Rosemary Soup

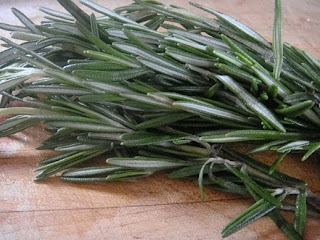
Fresh herbs rule. When the cold weather rolls in and puts my garden to bed for the winter, my herbs are what I miss the most. Grocery store herbs are alright, but my favourite place to buy fresh herbs in the winter is a little grocery/specialty shop in Dundas, Ontario, called Picone’s. Along with the beautiful display of aromatic fresh herbs, they also carry local and organic produce, artisan breads, specialty oils and vinegars, a beautiful pastry table, and, as we discovered on Friday, they make a mean Cafe Latte. I could extol the virtues of this little food market for this entire post. Really, I could ramble for on for days, it is such a cool little store. But this post, it is all about the rosemary, and what it does for this simple and unassuming soup. A handful of ingredients, just over half an hour of your time, and you will have a big pot of delicious, fragrant, mouth watering soup. And, if you are lucky, your rosemary will come from Picone’s, like mine did!

I have made this soup several times, but always with fresh rosemary. The flavour is divine, and I have my doubts that dried rosemary would measure up. I first found this recipe on the Orangette blog, and have since discovered it is also in my Once Upon A Tart cookbook, in the “Once Upon A Soup” section. I have really not altered it much at all, it is terrific as it stands. I made this batch when Jims Aunt came for lunch this weekend, served with a loaf of homemade bread and fresh butter. Simple, delicious, and satisfying. Well worth the drive to Picone’s to get your rosemary!!

Chickpea Tomato Rosemary Soup , Adapted from Once Upon a Tart

3 Tbsp olive oil

2-3 cloves garlic

1 – 6” sprig of rosemary

2 – 28oz cans of diced tomatoes with their juices

2 – 19 oz cans of chickpeas

1 900ml box of chicken or vegetable stock (or the equivalent amount of homemade)

Pinch of sugar

Salt and fresh ground pepper to taste


Peel and chop the garlic,


Remove the rosemary needles from the stem, and chop finely


Drain and rinse the chickpeas, set aside.


Warm the olive oil in a large Dutch oven or stock pot over medium heat. Add the garlic and rosemary, and let it cook for a minute or so, you don’t want to brown the garlic, you just want the flavours to infuse the oil. Add the tomatoes, ½ of the chickpeas, the stock, sugar, salt and pepper to the pot.

 Bring to a boil, reduce heat, and simmer, covered for 20 minutes.

Remove from heat and puree with an immersion blender. (if you don’t have an immersion blender, you can puree it in batches in your blender or food processor)

It should look a bit like this:


Return to the stove, stir in the rest of the chickpeas,

Heat til the chickpeas are warm.
Enjoy!

Thursday, March 25, 2010

Yoghurt Parfait


Every once in a while I come across an idea and say to myself, now, why didn’t I think of that before?? This little epiphany hit me shortly after reading this post on this blog, the one that inspired my yummy quinoa pudding post. In her pictures, she took her pudding to the beach in a mason jar. It didn’t hit me immediately...my epiphanies are sometimes like that; they need a nudge to come to light. This nudge came from the little containers that I take my daily yoghurt snack to work in. If I have any type of juicy fruit mixture in them, they tend to leak in my lunch bag, which is not pretty. Enter said Mason jar. I can layer my fruit and yoghurt, screw on the lid, and it never leaks, not even a little bit. Epiphany moment, complete with bells and whistles.

So this post is not a recipe per-say, but an idea you can take and adapt as you see fit. My favourite size jar holds about 3/4 of a cup, which is perfect for a mid morning snack.  We can control the amount of sugar, as well as the kind of yoghurt we eat, and it is cheaper than purchasing one of those little parfaits from the local donut store. Easy, cheap, and portable!

We like our yoghurt and berries layered, this is how our parfaits go together.
Gently macerate (lightly mashed with the potato masher)  some berries, and add sweetener of choice if desired.
Spoon into the bottom of the mason jar.
Spoon yoghurt of choice in the middle,
and more berries on the top.

Add the lid, and Ta Da, No leaks!

We use plain yoghurt, but you can use your favourite flavour, and mix up the fruit as you see fit. We have used raspberries, strawberries, blueberries, as well as mixtures of all three. Chunky applesauce also goes very nicely with the tart yoghurt flavour. Sometimes we drizzle some honey or maple syrup over the fruit, and top with a sprinkle of Lindy's granola.

Whatever you choose, it is a perfect mid morning snack in
a cute container that will not leak in your lunch bag.
I like to make up a few at a time to save time in the morning.
Enjoy!

Saturday, March 20, 2010

Isaac's Buttermilk Toaster Waffles


My boys have always loved breakfast food. Eggs, French toast, pancakes, waffles, they could eat these kind of foods till the cows come home. Then they would probably ask for seconds. So, when I was lucky enough to have a day off during march break, and I asked Isaac what he would like for breakfast, it was no big surprise that waffles were on the top of the list. This is the point when I should probably mention that he is hopelessly addicted to, ugh, frozen toaster waffles, from the grocery store. I know, it is sad. But, in my quest to convert him from a processed junk food loving kid to one who appreciates home cooked healthy food, I have stopped buying them. So, his help was recruited, and healthier waffles we would make.


I dug out my trusty waffle iron (and dusted it off...I haven’t made waffles in a while apparently!) and we proceeded to look for a recipe. I remembered this one from Orangette, but the shortbread part kind of threw him off (I will make these one day, but maybe for dessert, with some ice cream, and strawberries...swoon!!) Smitten kitchen was our next stop, and he was sold as soon as he read “ buttermilk”. (that word appears on his grocery store box too...) He mixed together the buttermilk, separated the eggs, and whipped the egg whites. I think I have a new kitchen apprentice in the making!

I doubled the recipe(the recipe below is not doubled) and froze the extras once they cooled, with wax paper between them in the freezer for easy removal, and....TA DA!! Homemade freezer waffles that I don’t mind him eating. Maybe I should have dusted off the waffle iron long ago!

Isaac’s Buttermilk Toaster Waffles (original recipe here)

1 cup whole wheat flour

1 cup unbleached white flour (original recipe used all white, feel free!)

1/2 tsp salt

2 Tbsp sugar

1 1/2 Tsp baking soda

1 3/4 cups buttermilk(I use buttermilk powder mixed with water)

2 eggs, separated

4 Tbsp butter, melted and cooled slightly

1/2 Tsp vanilla extract

neutral flavoured oil for brushing on waffle pan (I use grapeseed, but canola, or the spray cans work fine too)


Mix the dry ingredients together in a nice big bowl. Set aside.


In a separate bowl, combine the buttermilk and egg yolks. Mix in the butter and vanilla. Set aside.


Lightly grease your waffle iron (I used my silicone basting brush and some grape seed oil, you can use canola
oil, or pam) and plug in to preheat.


Mix the wet ingredients into the dry ingredients.


In a separate bowl, whisk the egg whites with an electric mixer until they will hold soft peaks.

They should look like this:


Fold them gently into the batter.


When waffle iron is preheated, ladle the batter onto the hot surface,


close and cook until the waffle is done, mine is usually about 4 minutes, different waffle irons will vary with their timing.


My first waffles always look a bit wonky til I figure out how much batter to use to fill the iron without overflowing it...

Serve while hot,


or cool to room temperature on cooling racks and store in freezer between sheets of waxed paper for easy toaster waffles.


Oh, so yummy!

Tuesday, March 16, 2010

Ginger Roasted Pear Scones

I get strange urges to bake sometimes. A certain flavour or smell will stick in my head and linger until I bake it out. When I made the roasted pears last night, I suddenly wanted to make roasted pear scones. With ginger. So I rustled up some willpower, and saved 4 roasted pear halves, (which I only used 2 of incidentally) and these scones are the result. The original recipe came from a cookbook that is slowly becoming my favourite, Once Upon a Tart. You may be seeing alot from that book in the near future.


I changed it up a bit to accommodate the roasted pears, and I think the next time I would feel comfortable reducing the butter to 2 sticks instead of 2 ½, there seemed to be an alarming amount of butter swimming on the pan when I checked the scones at 15 minutes, but it had mysteriously vanished by the 18 minute mark. The scones are delicious though. The crystallized ginger complements the carmelly roasted pears, with the buttery scone marrying it all together. It was the perfect sidekick to my morning latte. I guess this urge was not so strange after all!!

Ginger and Roasted Pear Scones

1 ½ cups unbleached flour

1 ½ cups whole wheat flour

1/3 cup sugar

1 tsp baking powder

¼ tsp salt

2 ½ sticks unsalted butter (cut up into ¼ inch cubes)I will reduce it to 2 sticks next time)

2 eggs

½ cup cold buttermilk (see notes below)

½ cup diced roasted pears (see method here)

½ cup diced candied ginger

1 tsp grated fresh ginger

Egg wash: 1 large egg mixed with 1 tbsp milk or cream

2 tbsp (ish) raw sugar for sprinkling tops


Preheat oven to 400 deg F. Make sure your rack is in the middle of the oven. Line a large pan with parchment paper, set aside.

Chop 2 halves of a roasted pear, approx 1/2 cup, set aside

Chop candied ginger, set aside


Grate fresh Ginger, a piece about this big...


Gives you about a tsp when grated, I use my rasp to grate, but you can use the smallest holes of a box grater too. (yes, that is a cut on my finger, very crusty bread and a serrated knife...'nuff said??)

Set aside for now.


Whisk together dry ingredients

Cut in butter with pastry blender until it is looks like moist crumbs, do not overmix,


In a separate bowl, beat the eggs


Add the buttermilk, ginger, roasted pears and crystallized ginger.


Add to dry ingredients


Mix just until the flour is incorporated, no longer, or your scones will be tough.


Using your hands(lightly flour your hands to keep dough from sticking), scoop out a small handful and shape into a ball. Place on parchement lined pan. Continue with the rest of the dough, you should end up with about 12 balls.


Press balls down with your palm


So they are about this thick


Brush with egg wash

Top with a sprinkle of raw sugar (a scant tsp per scone)


Bake for 18 – 20 minutes or until tops are golden brown. Remove from oven and let rest on pan for a few minutes before removing to a wire rack to cool.


Serve warm, preferably with your morning latte!


Buttermilk notes:

Buttermilk is generally not replaceable with regular milk in recipes.  I usually keep powdered buttermilk in my cupboard, I get it at the bulk food store.  If you dont have any buttermilk or powder, you can use a tablespoon of white vinegar to one cup of regular milk. Stir and let it hang out for a few minutes, and then use the amount called for in your recipe